PROJECT 2 | PARAMETRIC FORM
Final Form - Variation 1 | Smithsonian Institution Redevelopment, Washington DC
project2_screenshot0
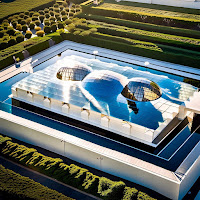
The first project goal was to recreate a parametric form and modify it with our design intents. I chose the Smithsonian Institution Kogod courtyard and inputted images of it to Chat GPT DALI, in hopes of generating a triangular grid over an origami glazing surface. Through DALI I was able to generate multiple Generative AI images to visualize my design intent and use it to create a grasshopper script. Unfortunately, I was unsuccessful in creating a grasshopper script to create my design intent the first time around. In project 2, I reevaluated my script and used several video tutorials* to generate a script using Kangaroo, a live physics engine to help in optimization and interactive simulations to test various outcomes. The grasshopper script used to create the new courtyard canopy parametric form is explained below,
Existing Column Structure
project2_screenshot1-1
project2_screenshot1-2
project2_screenshot1-3
The first step was to create the existing 8 columns that support the canopy. This was done by using the node point and moving them in the z direction to create a line and then connecting it to the pipe node with a radius parameter. This group of nodes was then connected to the canopy height parameter in the second step.
Initial Grid
project2_screenshot2-1
project2_screenshot2-2
project2_screenshot2-3
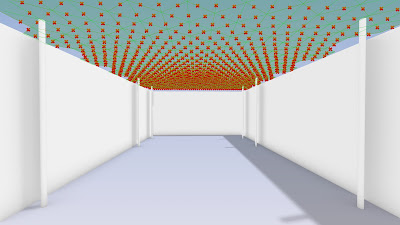
The second step was to create the initial grid to later generate a mesh surface for the canopy. This was done by using a Hex grid node exploding the curves and grafting the points to then extrude the points in the next step. At this point, a move node was added to the Hex grid node to adjust as needed in the z direction and generate an xy plane.
project2_screenshot3-3
The third step was to use the extruded points and simplify them to connect to a partition node and move every 2 points into a new curve. Furthermore, these points were then merged to generate a grid variable parameter to adjust the initial hex grid into new grids.
Point and Curve Entwine
project2_screenshot4-1
project2_screenshot4-2
project2_screenshot4-3
The fourth step was to take the evaluated curves and points following the partition using the entwine node to generate a loop and connect the points and lines to then be able to join together. This would allow the twining of the grid variable parameter variables with the selected point parameter later in the steps.
Weaver Bird Join
project2_screenshot5-1
project2_screenshot5-2
project2_screenshot5-3
The fifth step was to use the Weaverbird Join Meshes and Weld node to flatten the meshes generated from the point and curve partition and entwine. These meshes begin to create the fold appearance of an origami structure.
Point Pull
project2_screenshot6-1
project2_screenshot6-2
project2_screenshot6-3
The sixth step was to pull the points of the deconstructed meshes from the previous step and use an anchor node to keep the parameter points in a fixed location and prevent the simulation from applying to the points. Using the cull pattern node with the anchor then further controls the points in the script and checks to see if a point is located inside a closed curve.
Hinge Point Extraction
project2_screenshot7-1
project2_screenshot7-2
project2_screenshot7-3
Furthermore, the sixth step works in combination with the Hinge point Extraction to develop the hinges with the edges of the meshes made through Weaverbird. In this step, the points parameter is pulled, remapped and manipulated through a graph mapper bounded by a remap to create a list of numbers to be adjusted when run through the kangaroo simulation.
,
Hinge Component + Extracted Curve Height
project2_screenshot0-1
The seventh step takes the anchored points from the pulled points and the hinge points extracted from the previous step to provide the points for the angle created in the hinge node which can be adjusted with a strength parameter to determine the weighting of the distances of the points. The extracted curve height merges the previous edges generated and entwines them to create a length line which can be adjusted by a strength parameter as well. At this step, the stability of the hinges and extracted curves are joined together in preparation for the kangaroo simulation.
project2_screenshot8-3
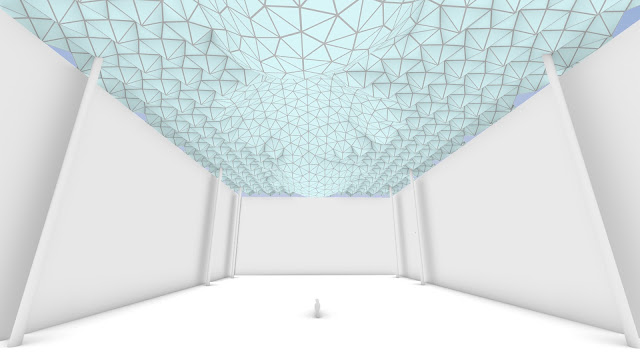
The eighth step takes all the previous steps and runs them through a simulation and ultimately creates the origami like formation which can then be visualized for optimization to find the best form. Kangaroo Solver has allowed me to visualize an origami canopy that can be adjusted based on the dome height, strength of the heights of the curve hinge extraction, hinge strength, and grid manipulation to test various scenarios manipulation resulting in combined meshes.
Glazing Structure + Glazing
project2_screenshot9-1
project2_screenshot9-2
project2_screenshot9-3
The final step was to separate the glazing from the structure and create separate meshes for each component. This step was done to visualize material and generate AI images for visualization. This was done by taking the mesh edges and exploding them to list the points to be used in a cull pattern and remove repeating numbers and then ultimately creating a separate mesh for the glazing.
Final Form - Variation 1
project2_screenshot10-1
project2_screenshot10-2
Final Form - Variation 2
project2_screenshot11-1
project2_screenshot11-2
Final Form - Variation 3
project2_screenshot12-1
project2_screenshot12-2
Final Form - Variation 4
project2_screenshot13-1
project2_screenshot13-2
Final Form - Variation 5
project2_screenshot14-1
Final Form - Variation 6
project2_screenshot15-1
project2_screenshot15-2
Click the photo gallery link above to see more generative AI images of the final form variations☝!
* References
Arsitektur, I. (2022, January 17). Simple origami fold using kangaroo plugin | parametric model. YouTube. https://www.youtube.com/watch?v=htxKMyhoe5k
Beast, 3D. (2021, October 21). Origami architecture tutorial Rhino Grasshopper. YouTube. https://www.youtube.com/watch?v=gAZbLxsVcow
Lab, P. storm. (2021, March 13). Rhino && Grasshopper 031 || simple folding way. YouTube. https://www.youtube.com/watch?v=dqvwpewYlck
Yama, S. (2021, June 18). Grasshopper | tips | how to use Hinge. YouTube. https://www.youtube.com/watch?v=qbt20IxzQAk


